A loose stator core in a generator can cause vibrations, overheating, and reduced efficiency. If not fixed, it may lead to insulation failure, noise, and even generator breakdown. Since generators are vital for power generation, timely repairs are essential to maintain stability and extend their lifespan.
Understanding the Causes of Stator Core Loosening
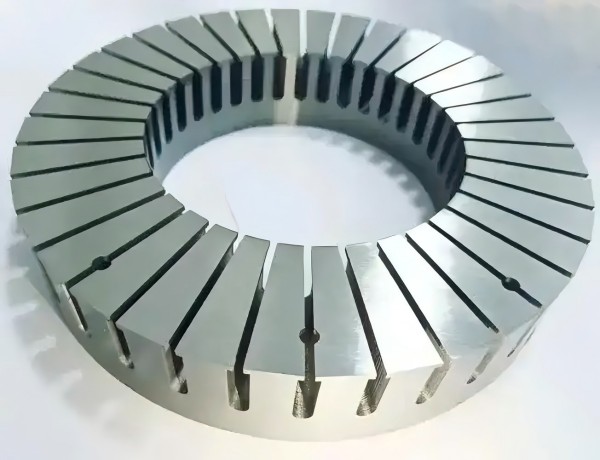
Thin, laminated silicon steel sheets are stacked to create the stator core, which lowers eddy current losses and boosts efficiency. They are secured with interlocks, adhesives, welding, or clamping. However, operational and environmental factors can cause loosening over time, such as:
- Mechanical Stress and Vibrations: Prolonged generator operation, sudden load fluctuations, and improper alignment can create excessive mechanical stress, weakening the stator core’s structural integrity.
- Thermal Expansion and Contraction: Generators operate under varying thermal conditions. Repeated heating and cooling cycles cause laminations to expand and contract, gradually leading to loosening.
- Corrosion and Oxidation: Moisture, airborne contaminants, and environmental pollutants can cause rust formation on the laminations, deteriorating their bonding strength.
- Improper Installation or Maintenance: Inadequate clamping, loose fasteners, and improper bonding techniques during assembly or maintenance can contribute to early-stage loosening.
Loose laminations create gaps, leading to higher core losses, vibrations, and insulation damage. If ignored, these issues can reduce generator efficiency and lifespan. Preventing more damage requires early discovery and restoration.
Inspection and Diagnosis of a Loose Stator Core
Before proceeding with repairs, a comprehensive inspection must be conducted to determine the extent of core loosening. The following diagnostic methods are widely used in the industry:
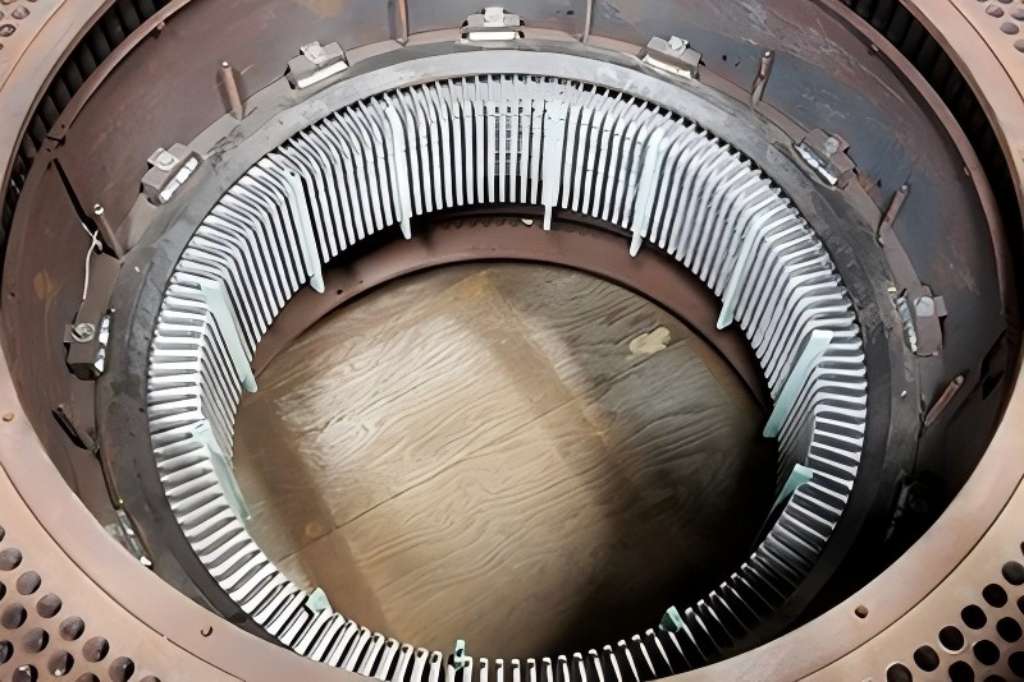
Disassembly and Visual Inspection
- Open the generator casing and carefully remove the rotor.
- Inspect the stator core for any visible gaps, discoloration, or signs of rust and corrosion.
- Examine the ventilation slots; the presence of red rust indicates core loosening.
Rust Examination
- Rust accumulation between laminations suggests prolonged exposure to moisture and weakening of the core’s structural integrity.
- Use a bamboo stick to gently remove rust deposits, followed by compressed air to clear rust powder from the slots.
Vibration and Noise Analysis
- Conduct vibration analysis to detect unusual oscillations caused by core instability.
- Monitor abnormal noise levels, such as humming or rattling, which may indicate loosened laminations.
Thermal Imaging
- Utilize infrared thermography to identify localized hotspots, a sign of increased iron losses due to lamination gaps.
Electrical Testing
- To evaluate the electrical integrity of the stator core, conduct tests for impedance and insulation resistance.
- Conduct magnetic field distribution analysis to detect any irregularities caused by loosened laminations.
Ultrasonic Testing
- Utilize high-frequency ultrasonic waves to detect internal lamination delamination that is not visible externally.
Once the level of core loosening is determined, the appropriate repair technique should be applied to restore structural integrity and functionality.
Effective Repair Techniques for Loose Stator Core
1. Core Restacking and Tightening
For cases where minor core loosening is detected, restacking and tightening the laminations can effectively restore integrity:
- Remove the stator core from its housing carefully.
- Align and re-stack the loose laminations to their original position.
- Apply hydraulic presses or high-pressure clamps to compress the stack securely.
- Reapply insulating varnish or coatings to prevent short circuits and oxidation.
This technique is most suitable for early-stage loosening where severe mechanical damage has not yet occurred.
2. Core Bonding with Epoxy Resin
For moderate cases of core loosening, epoxy resin bonding is an effective method:
- Gently pry open the loose silicon steel laminations using a little screwdriver.
- Apply heat-resistant epoxy paint to a thin mica sheet and insert it into the gap.
- If the gap is large, use bakelite or insulating cardboard dipped in epoxy resin.
- Ensure the filled material conforms to the shape of the stator teeth.
- Apply a layer of moisture-proof insulating paint to protect against environmental factors.
This method reinforces lamination bonding while maintaining insulation integrity.
3. Repairing Loose Core Teeth
If the stator core teeth are loose, additional reinforcement is required:
- Insert multiple wedges at different axial positions, ensuring they are coated with epoxy resin.
- Carefully place wedges without damaging adjacent insulation or winding wires.
- Select non-magnetic wedges to maintain optimal electromagnetic performance.
This method effectively stabilizes core teeth and prevents further loosening.
4. Reinforcing Edge Laminations
When the edge laminations of the core become loose:
- Insert a non-magnetic steel wedge between the laminations and the tooth strips.
- Weld the wedge to the tooth strips using a 3AT welding rod while avoiding excessive heat exposure.
- If the laminations are held by two tooth strips, insert copper wedges between each tooth and the air duct strip, then weld them securely.
Proper welding techniques must be applied to prevent damaging the core’s insulation.
5. Repairing Loose Laminations in the Middle of the Core
In extreme situations where the core’s middle laminations come loose:
- Remove the coil before conducting repairs.
- If the core is tightened by bolts, re-tighten them to restore compression.
- If the core is internally pressed, clean the loosened area with gasoline to remove oil and rust.
- Insert a mica sheet into the gap and bond it with epoxy resin.
- If the core is excessively loose, use multiple slot sample rods at symmetrical positions.
- Peel off the welding points of the tooth pressure strips, re-tighten the core, and re-weld the strips.
This approach restores internal structural integrity while maintaining proper insulation.
6. Welding and Brazing Techniques
For extreme cases, welding or brazing may be required:
- Use spot welding or brazing at critical points to reinforce laminations.
- Apply controlled heat to prevent overheating and core distortion.
- Utilize non-magnetic filler materials to avoid affecting electrical efficiency.
Welding should be carefully performed to avoid degrading the magnetic properties of the stator core.
7. Core Replacement
If all repair techniques fail and the stator core remains unstable:
- Completely remove the damaged stator core from the generator.
- Install a new, properly aligned replacement core.
- Conduct rigorous electrical and mechanical testing before reassembly.
Although costly, core replacement ensures long-term generator reliability.
Preventive Measures to Avoid Future Loosening
The following precautions must be taken in order to lessen the possibility of stator core loosening:
- Frequent Upkeep: To find early indications of loosening, periodically check and maintain the generator.
- Proper Installation Techniques: Ensure correct alignment and secure fastening of laminations during assembly.
- Vibration Reduction: Implement vibration-dampening mechanisms to reduce mechanical stress.
- Corrosion Protection: To stop rust and oxidation, provide protective coatings.
- Temperature Management: Optimize cooling systems to minimize thermal expansion and contraction.
By adhering to these preventive strategies, generator operators can extend the lifespan of the stator core and enhance overall performance.